Polygon Packing
2021-04-21You might have heard of tesselations, and you’ve definitely seen a few before. A tesselation of a flat surface simply involves covering it in shapes, without having any overlap or leaving any gaps. For example: the tiles on your kitchen floor are a tesselation (unless you’re missing some tiles). A mosaic is a tesselation. The infinite variety produced from a few simple shapes in a Penrose Tiling are tesselations. There are many beautiful examples of tesselations online, and they have been used to create art for millenia.
I was curious what would happen if we changed the requirements for making tesselations a little, and instead used the following rules:
- No overlapping shapes (the same as a tesselation).
- Gaps can exist between shapes (different from a tesselation).
- Shapes must be layed edge-to-edge (to enforce some structure).
By allowing for gaps between shapes, this becomes a variant of Packing problems. These problems try to fit shapes into containers, allowing for some space between shapes as it may not be possible to create a perfect fit. I wasn’t so interested in finding “optimal packings”, but instead just looking for the patterns that arise when we apply these rules.
Packing procedure
Before looking at results, let me describe at a high-level how my polygon packing algorithm works. You can skip this part if you’re not interested, but I think it’s important to have a high-level understanding to appreciate the results.
The algorithm does the following:
- Place the
shapewe’re packing at the center, e.g. (0, 0). - As long as we don’t have
count(e.g. 100) shapes placed, repeatedly:- Look at the closest edge to the center that doesn’t have a shape next to it yet.
- Find an edge on our
shapewith the same length, and place our shape against it (reflecting it if need-be). - If it doesn’t collide with any other shapes in out packing, save it.
You can think of it as trying to place shapes as close to the center without overlapping, but only when sitting edge-to-edge with another shape that’s already been placed.
To demonstrate what’s going, I’ve drawn the first few iterations of this algorithm against a triangle:
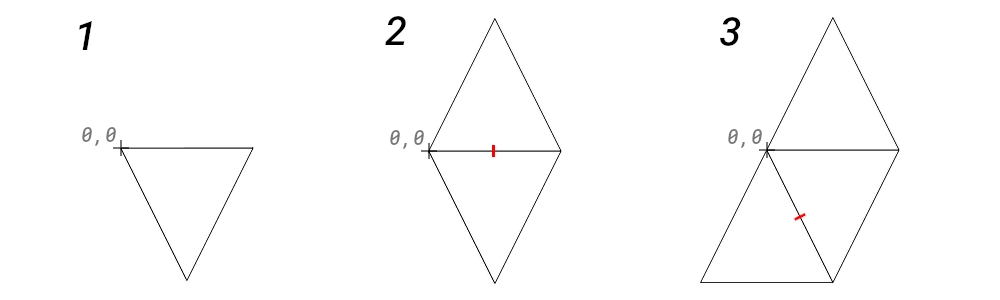
0,0. The edge we pick to line up our
shape against is given a red tick mark. After just a few iterations the
result is quite predictable, and a little boring. It gets more interesting as
we start to pack more shapes (see below).Pseudocode
If you’re interested, here is some (unoptomized) python-esque pseudocode. This part is definitely skippable.
# `shape` the shape we will pack, located at the origin
# `count` is how many shapes we want to pack
def polygon_packing(shape, count):
  result = [shape.copy()]             # place a shape at the center
  open_edges = queue(shape.edges())   # all edges, sorted by distance to (0, 0)

  while len(result) < count:            # keep going until we have `count` shapes
    edge = open_edges.pop()             # look at the closest edge to (0, 0)

    if edge is None:                    # if no edges remain, we're done early
      print("ran out of edges early...")
      return result

    for new_shape in shape.options(edge):   # all rotations/flips around `edge`
      if not new_shape.collides(result):    # if there's not a collision
        result.add(new_shape)               # save the shape
        open_edges.push(new_shape.edges())  # save the edges for later packing
        break

  return result
Sidenote: There are a surprising number of edge-cases when looking for colliding shapes when allowing for (and encouraging) shapes to lie edge-to-edge. I might do an explanation of these in a later post if anyone expresses interest in trying to implement this themselves.
This code is rather simple, and as long as you understand what it’s doing, it shouldn’t be a surprise (at least in small cases) how shapes are placed next to one another. The “magic” happens when you scale this up to several thousand shapes.
Results
These results were all plotted with a pen plotter. I’ll be walking through how different shapes wind up packing together.
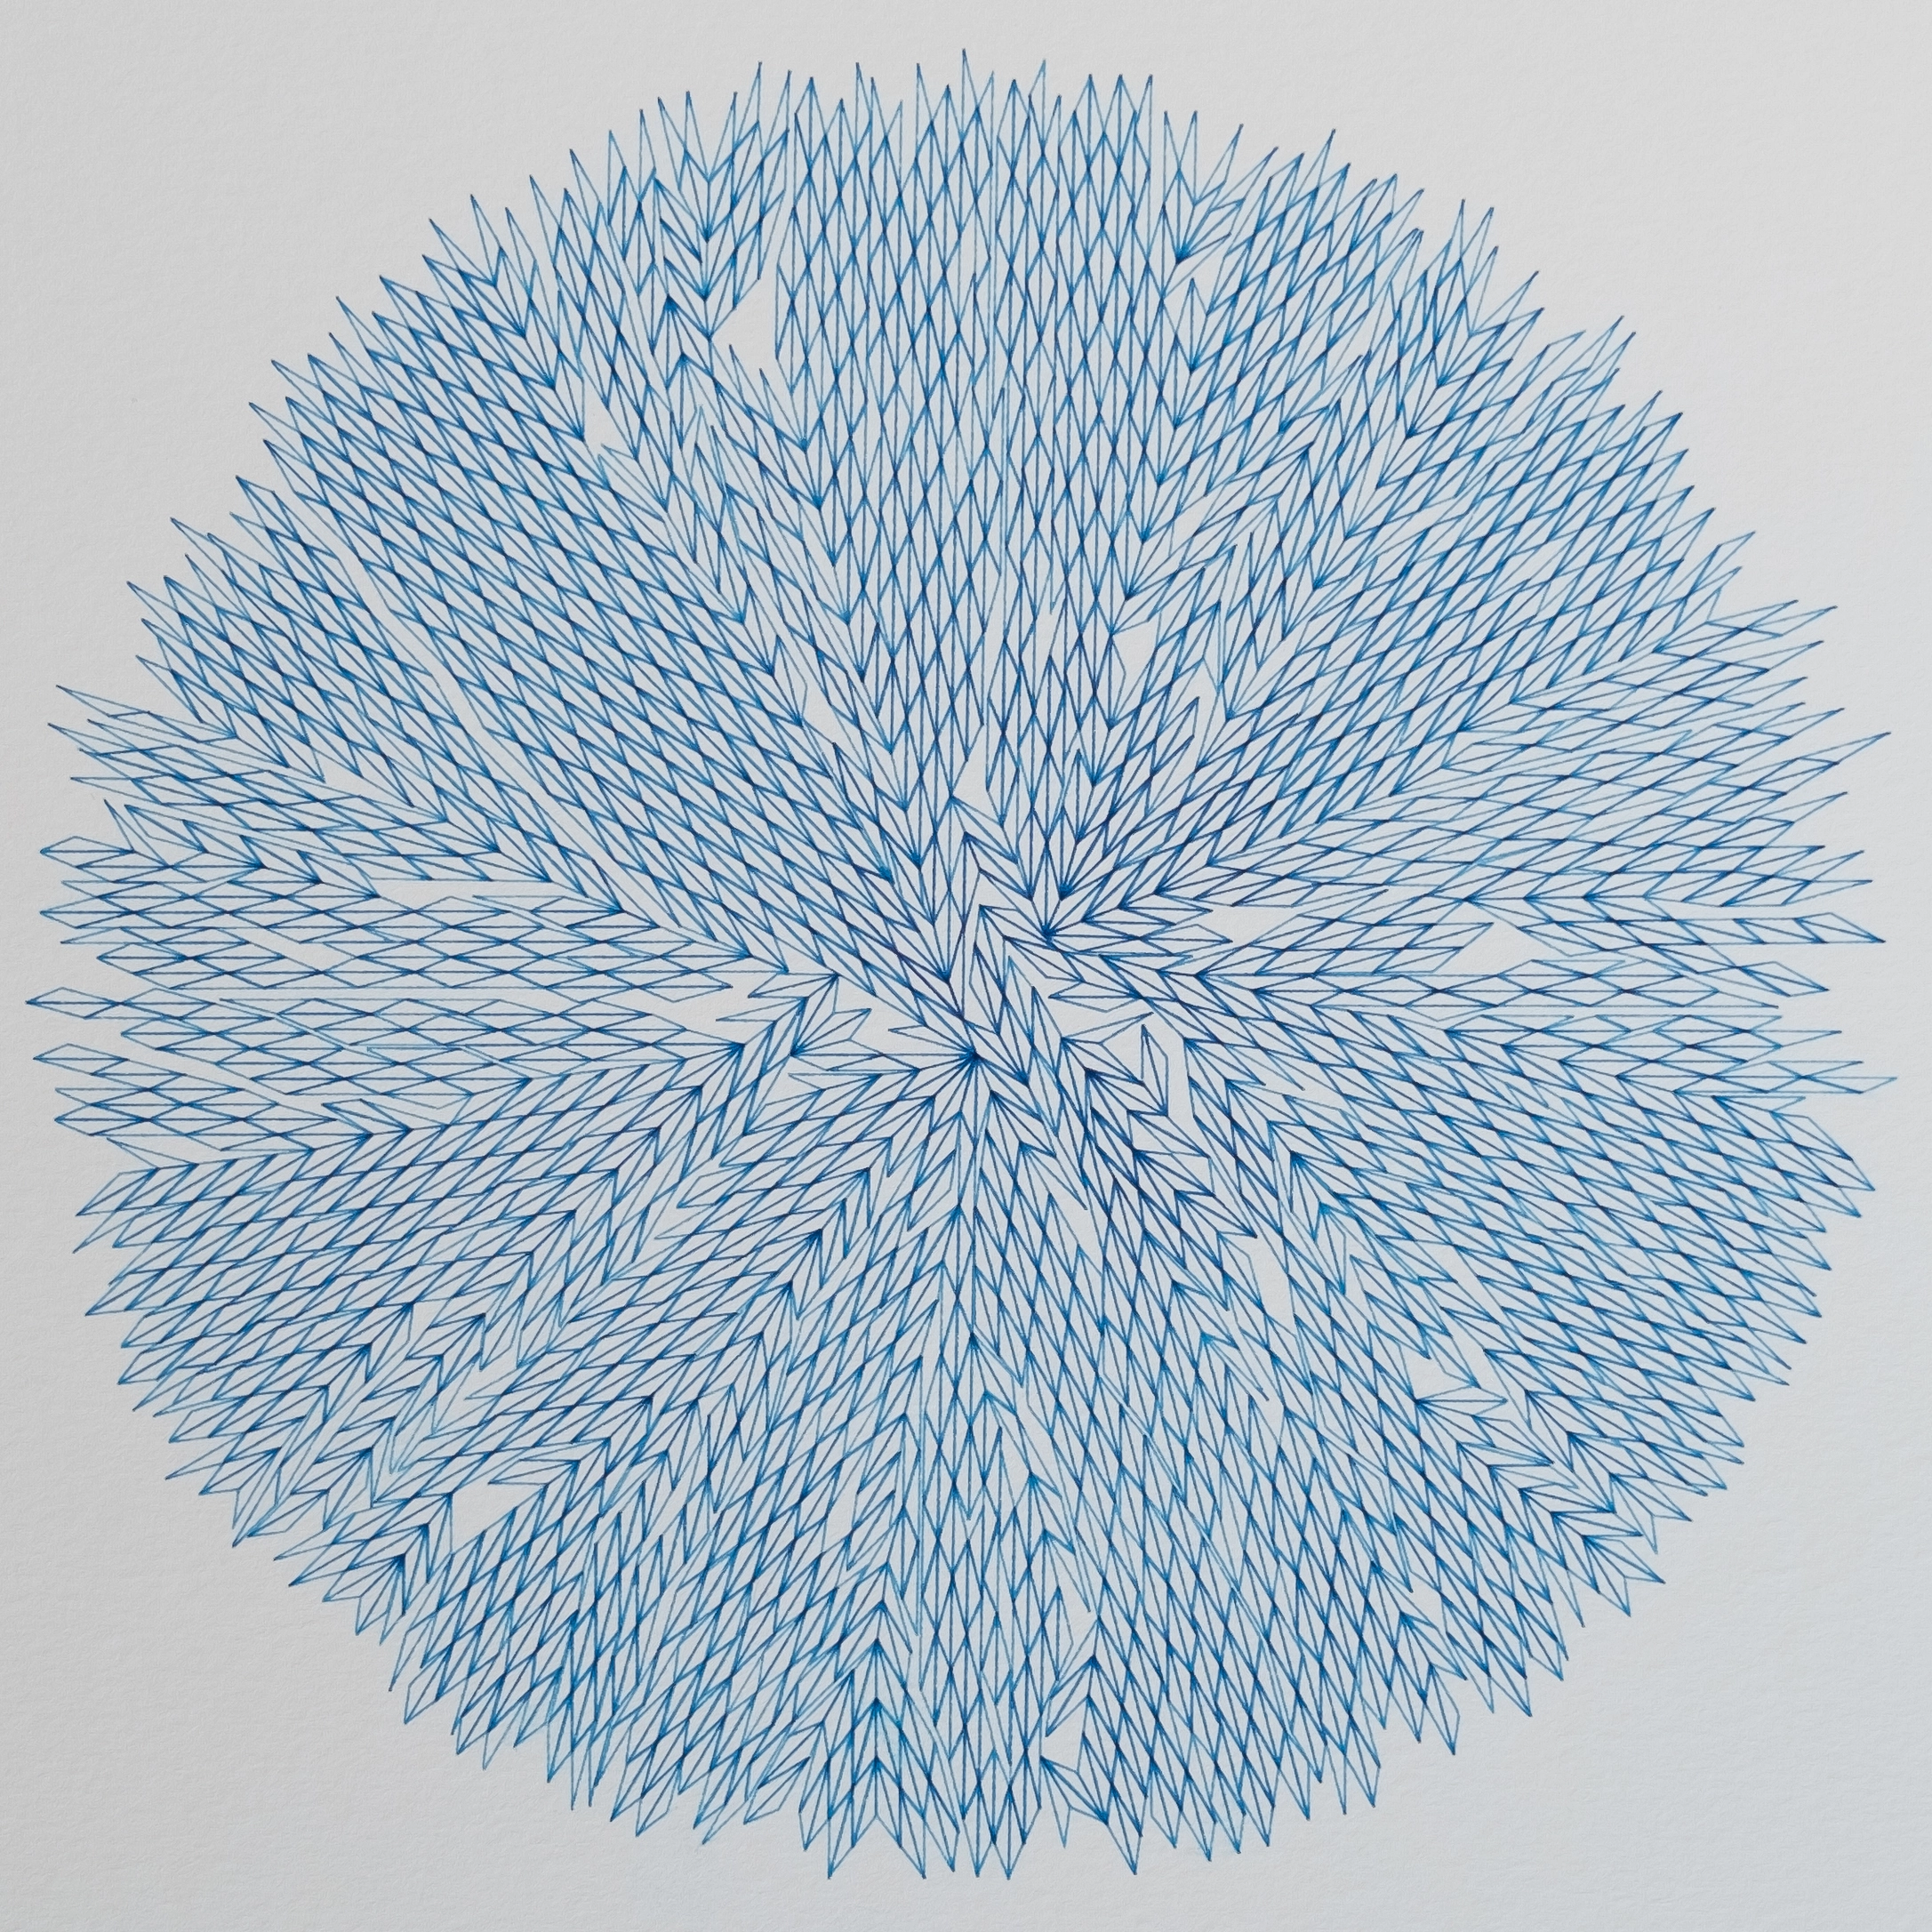
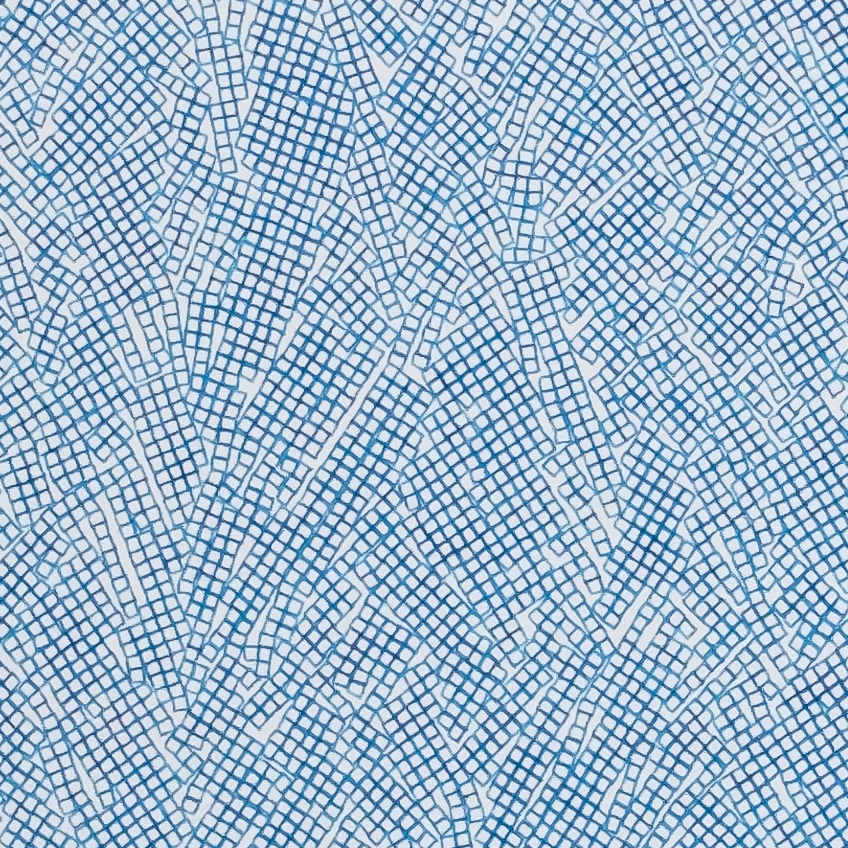
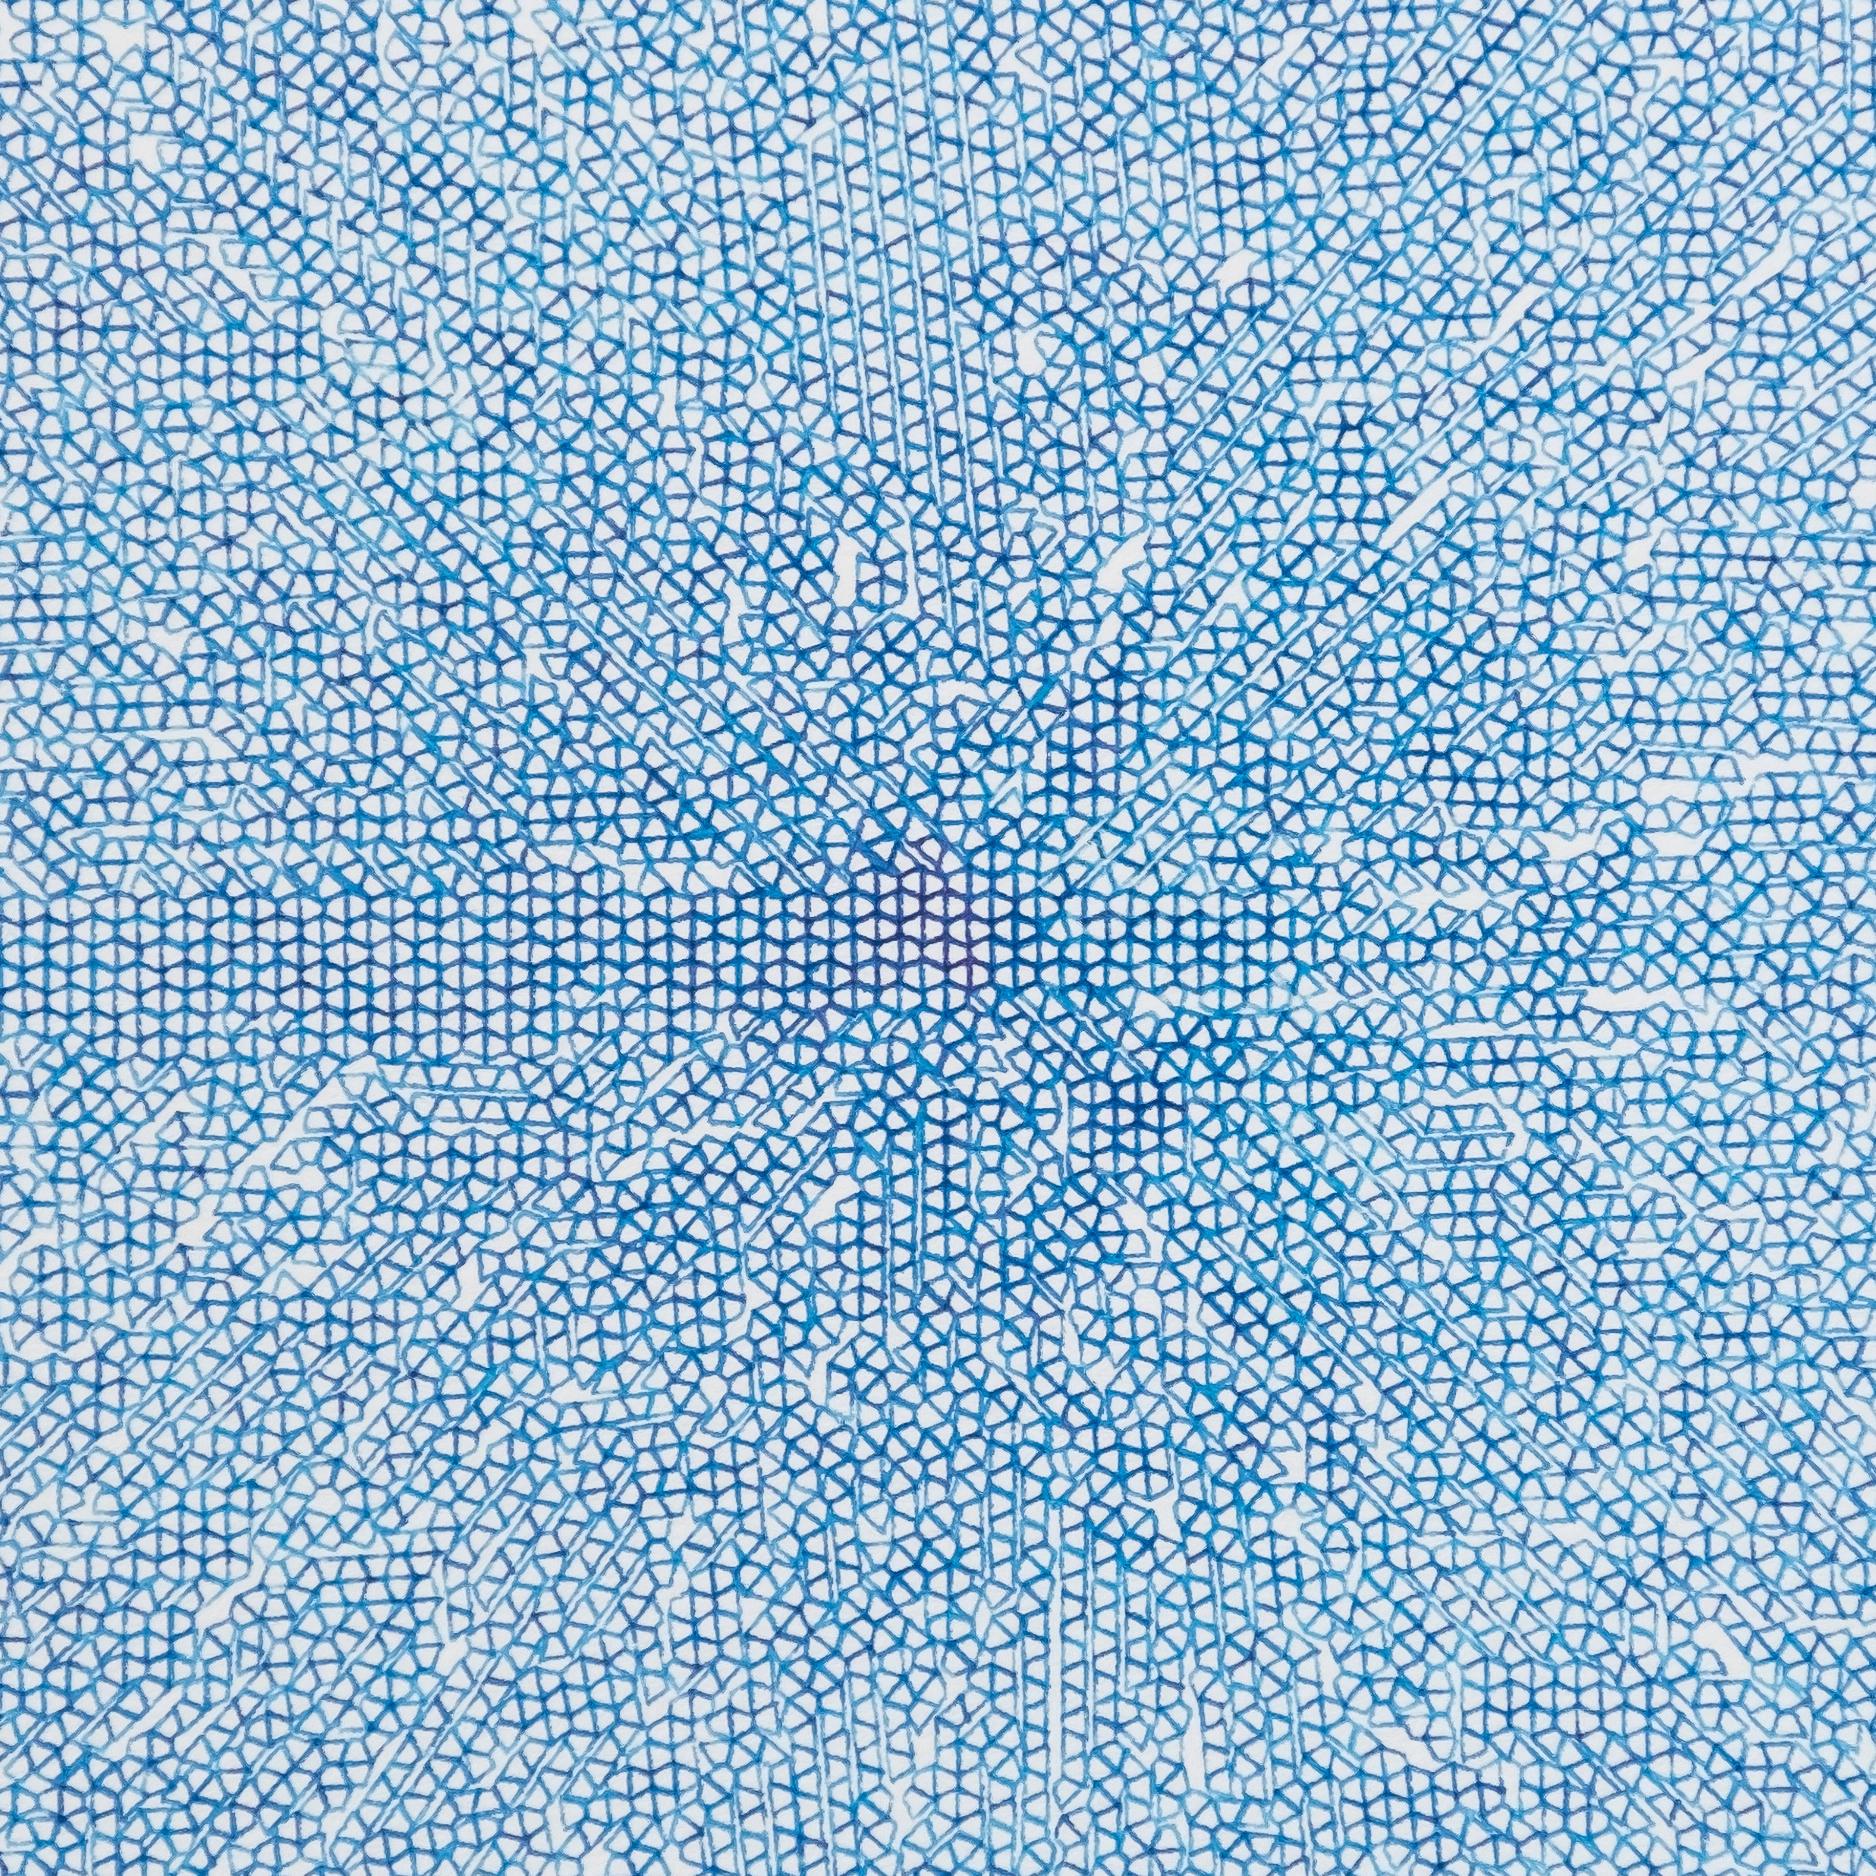
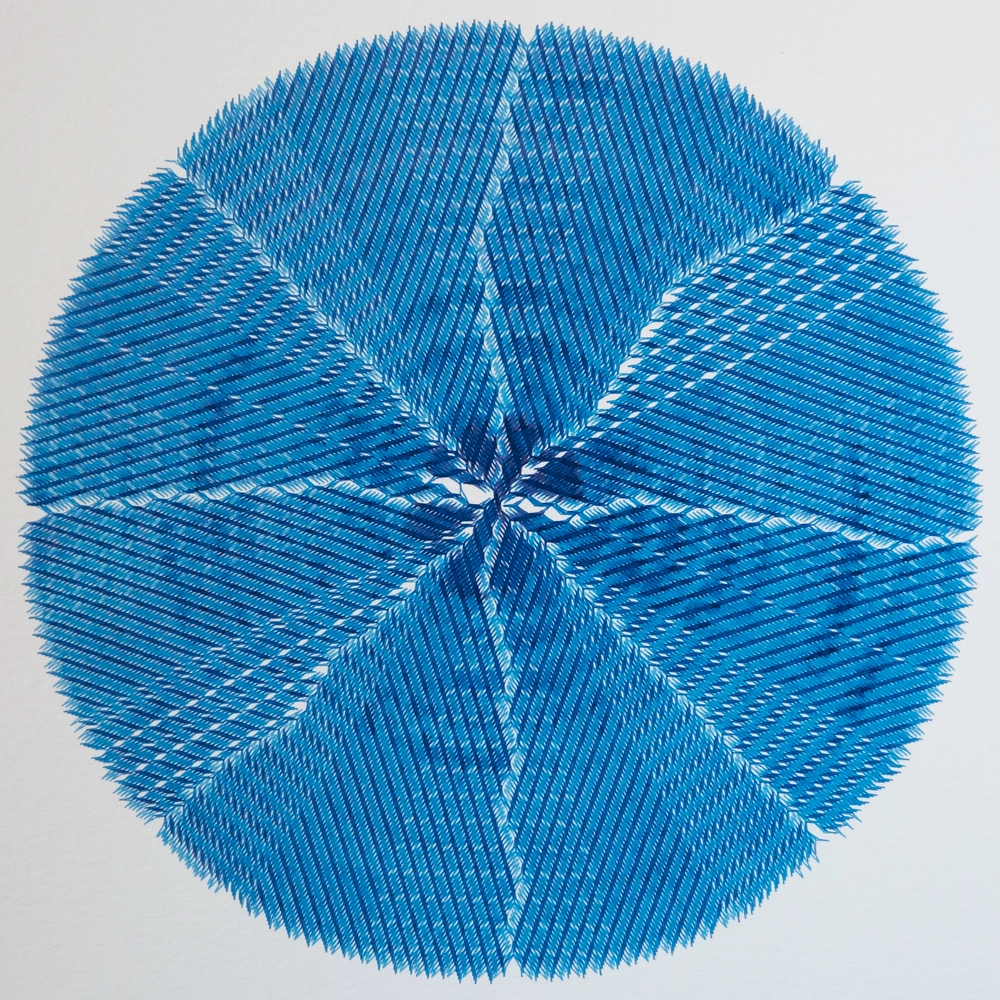
Triangles
I started by packing differently shaped triangles, on the order of a few thousand at once. The result is immediately quite satisfying, and reminds me visually of grain boundaries found in crystalline structures.
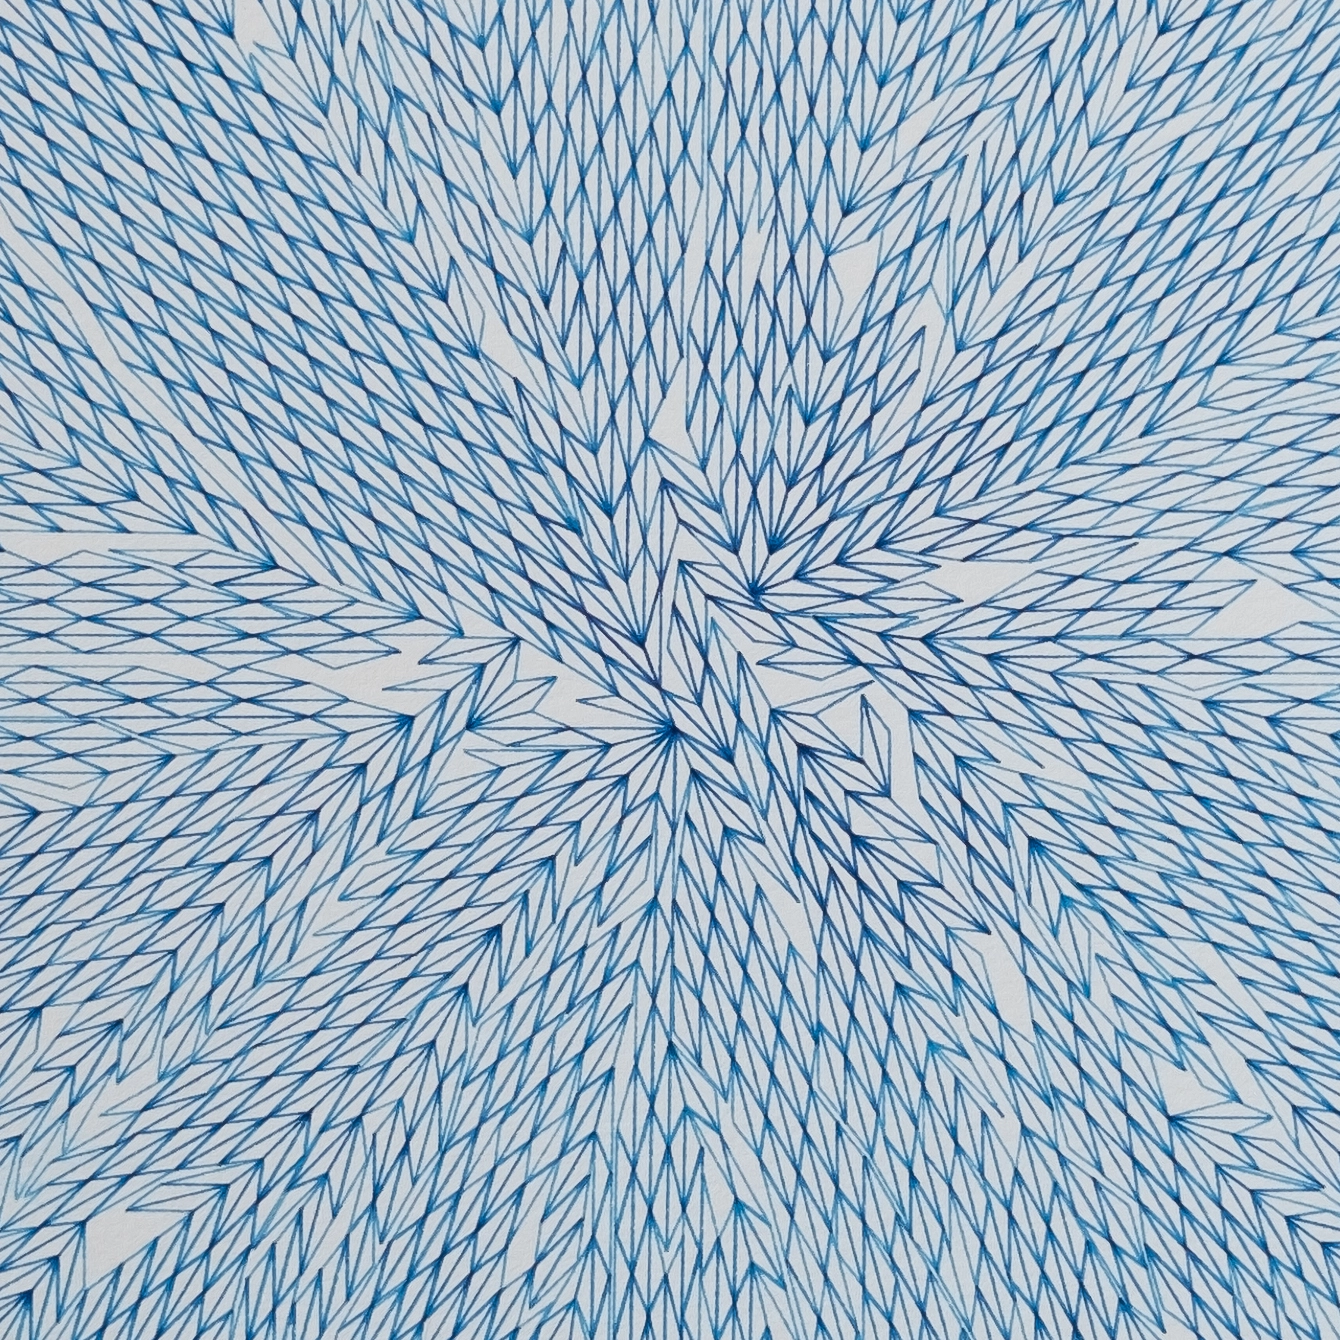
Parameters
shape: [0, 2], [2, 0], [0.9, 0.45]
count: 3000
Parameters
shape: [0, 2], [2, 0], [0.9, 0.45]
count: 3000
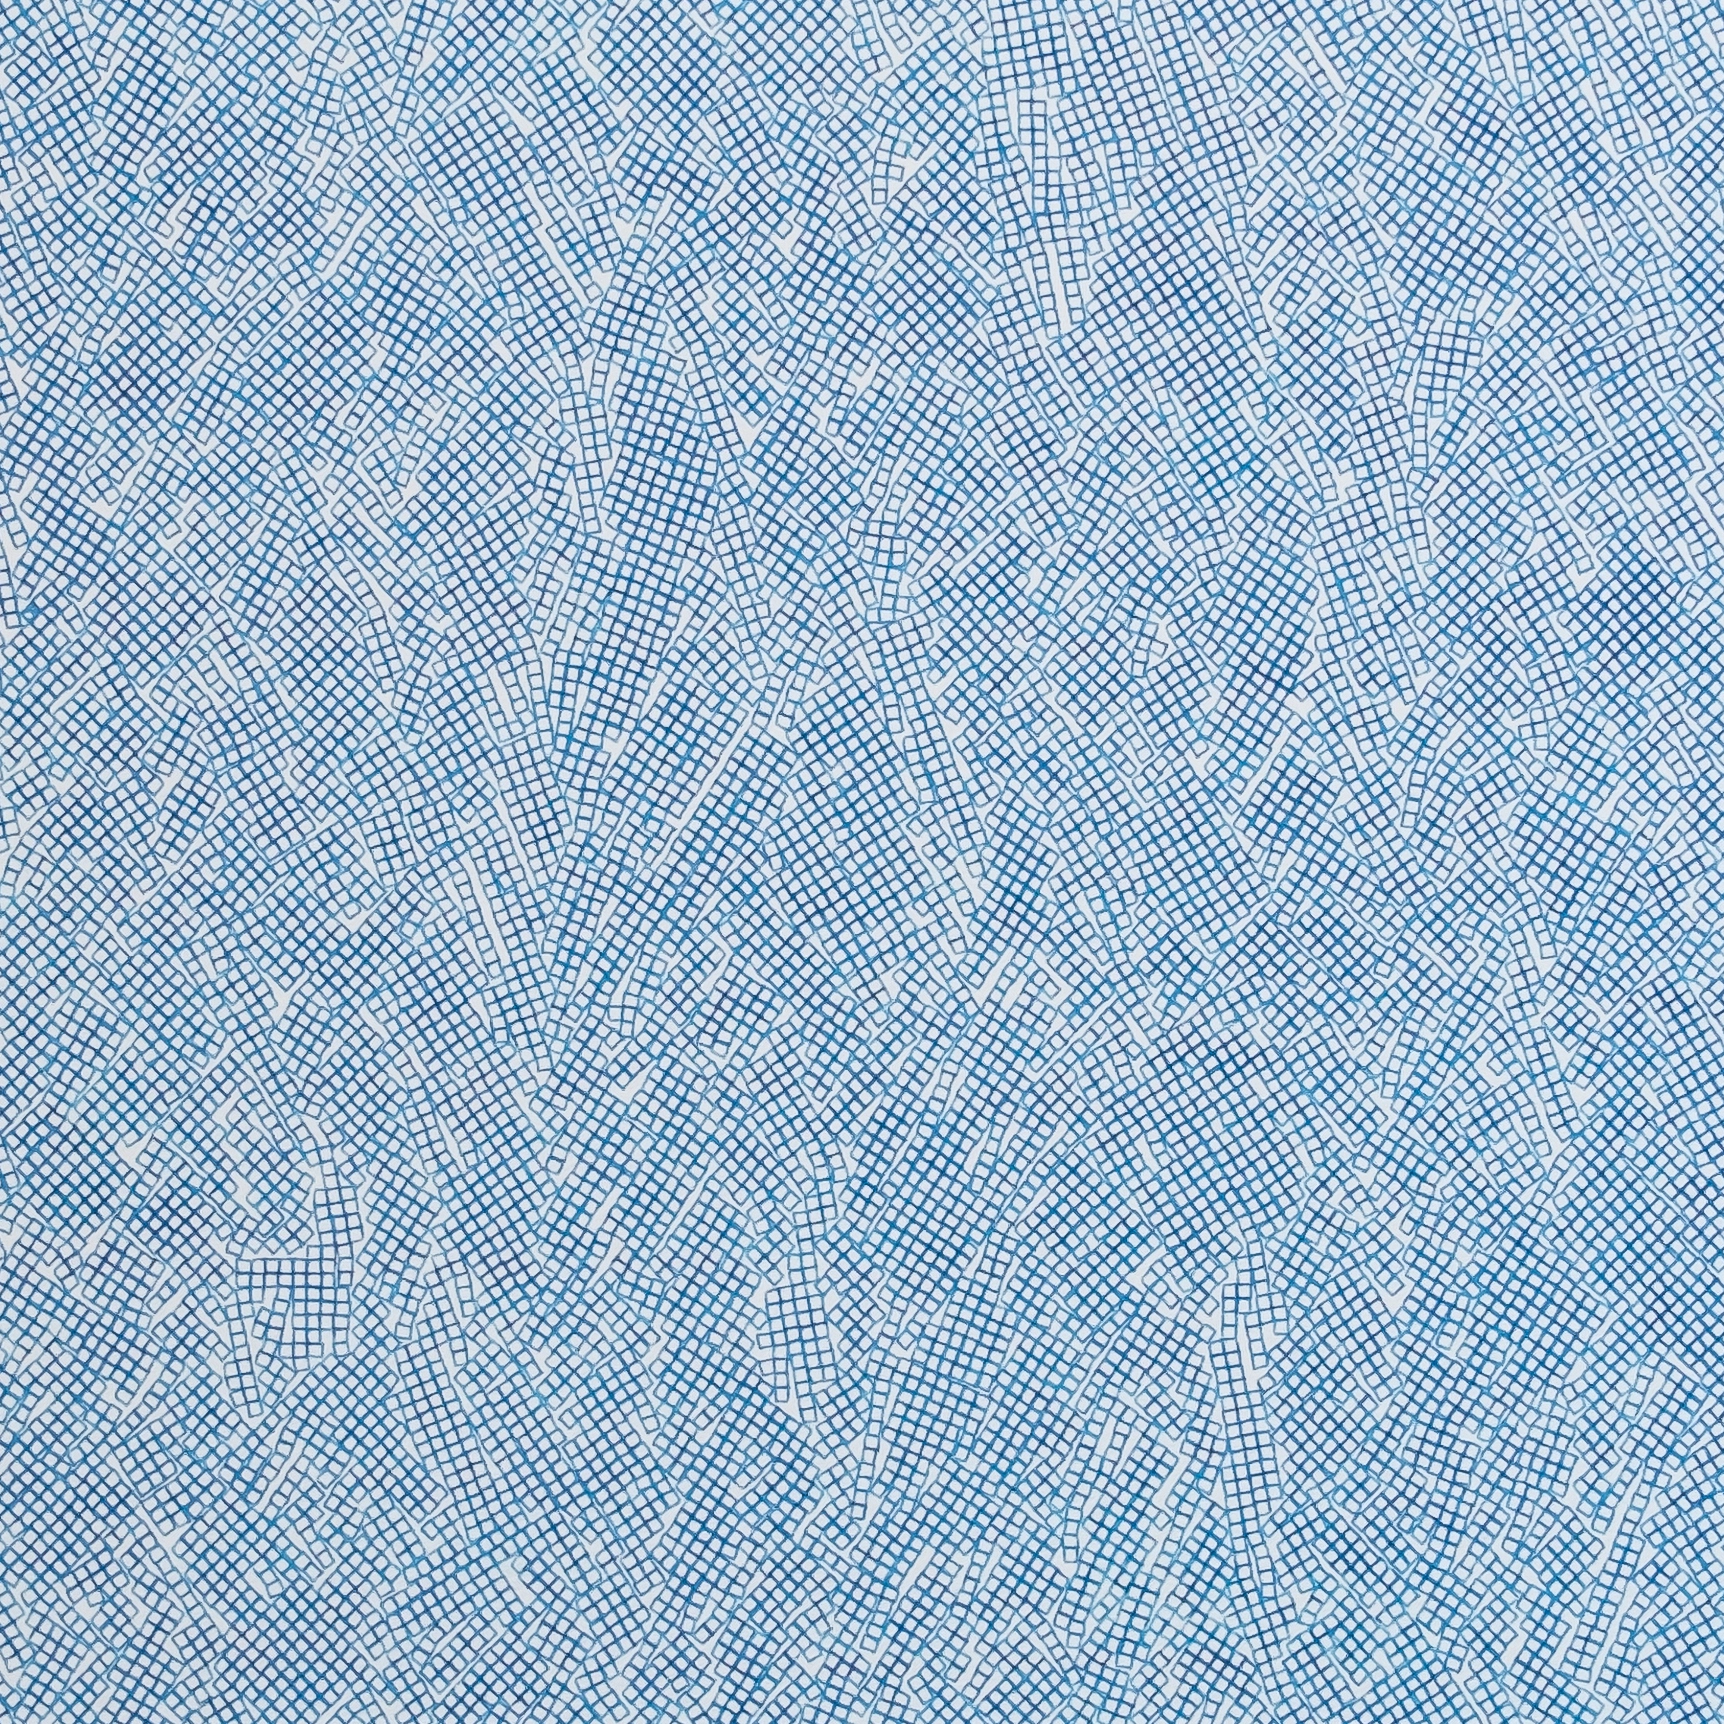
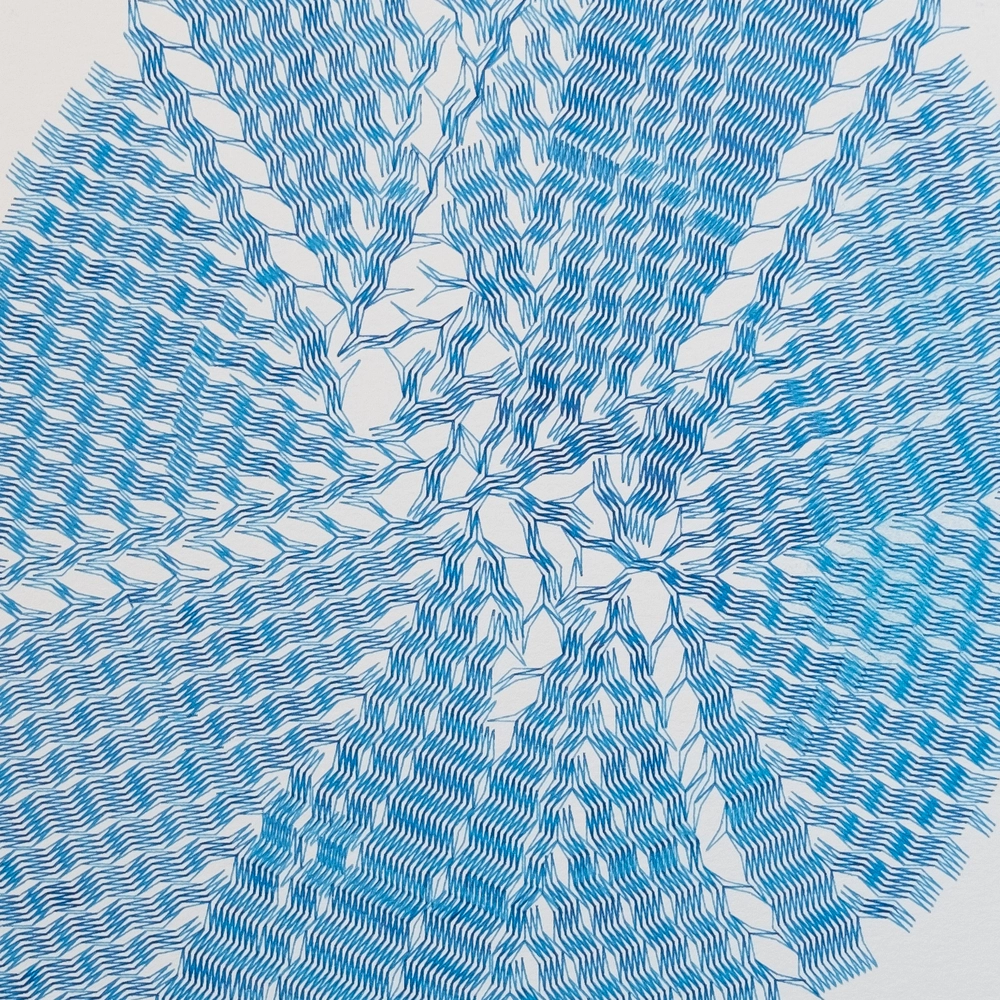
Moving shapes far away from the origin, in effect forcing them to pack close to a line rather than a single point creates even more clearly delineated grain boundaries:
Parameters
parameters lost due to technical error
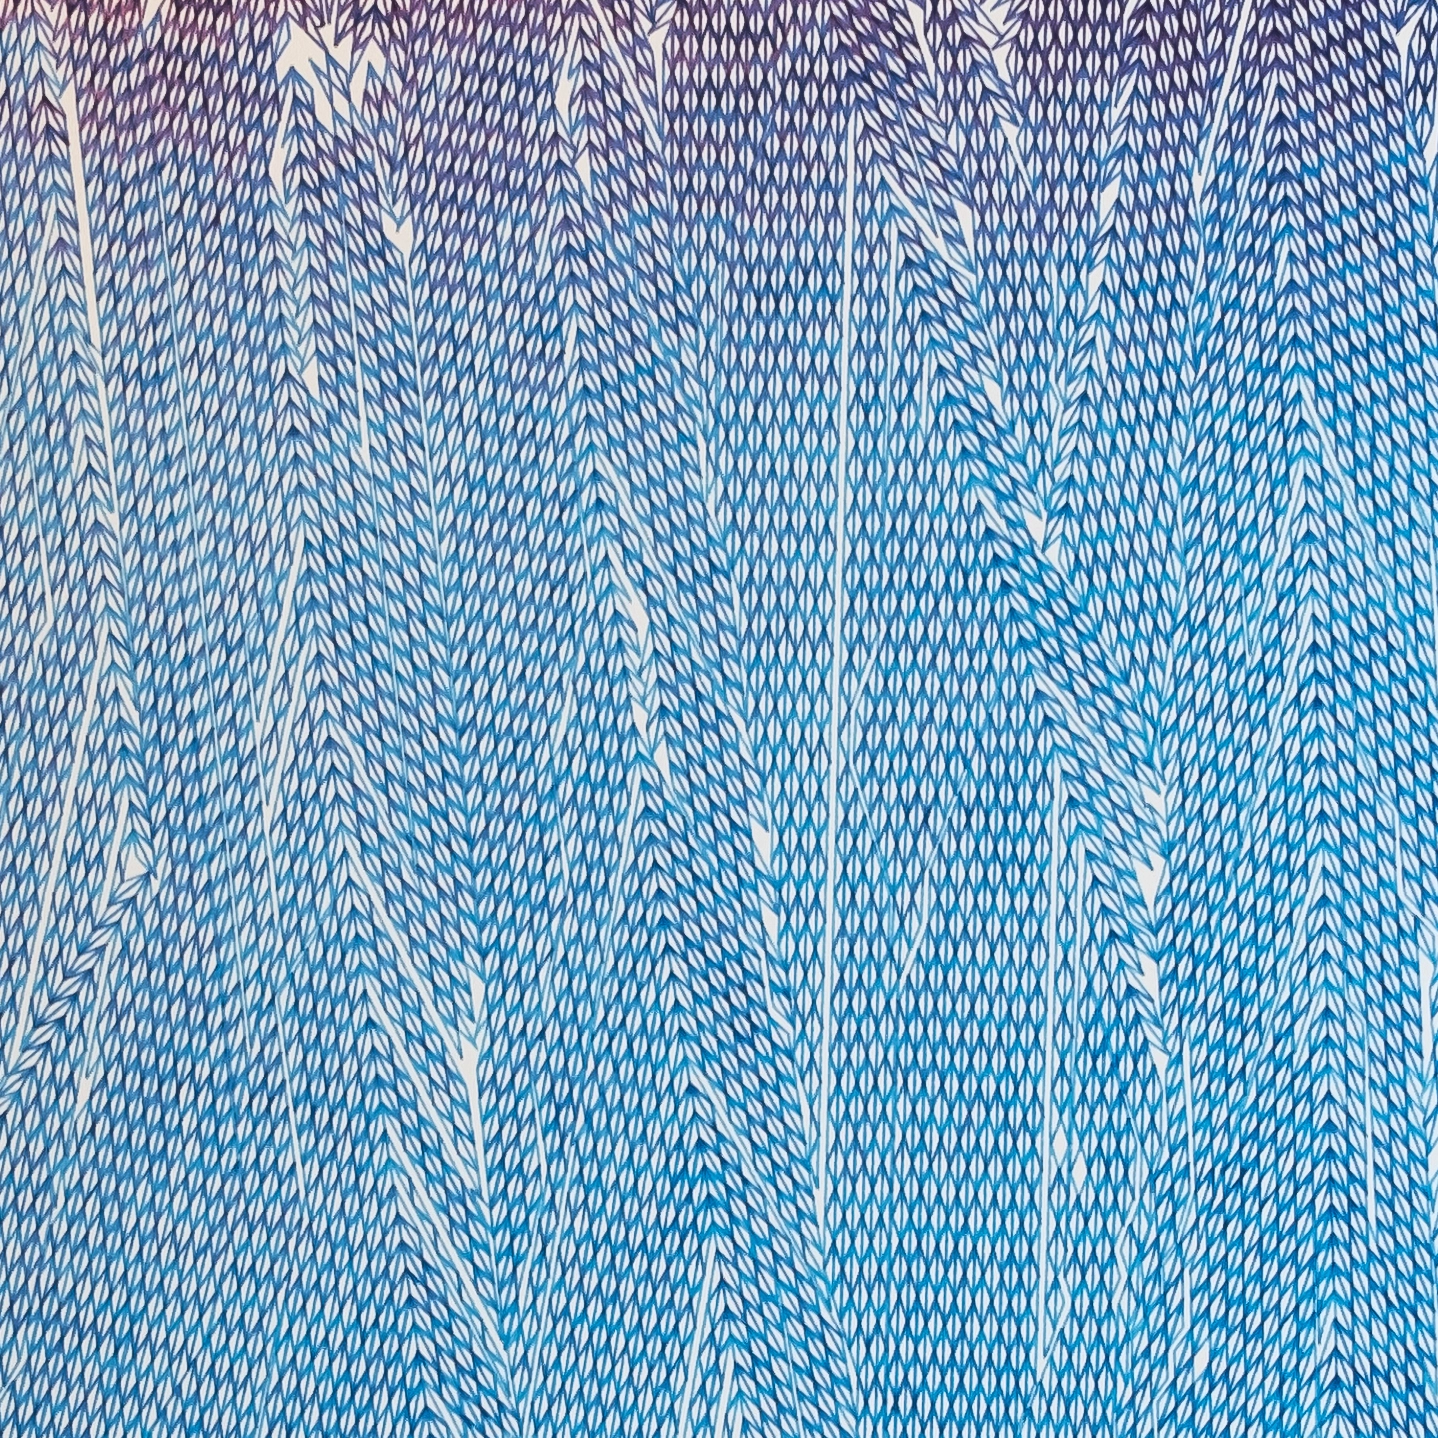
Watercolor
For fun, I’ve also used the pen plotter to create a watercolor of these triangle packings:
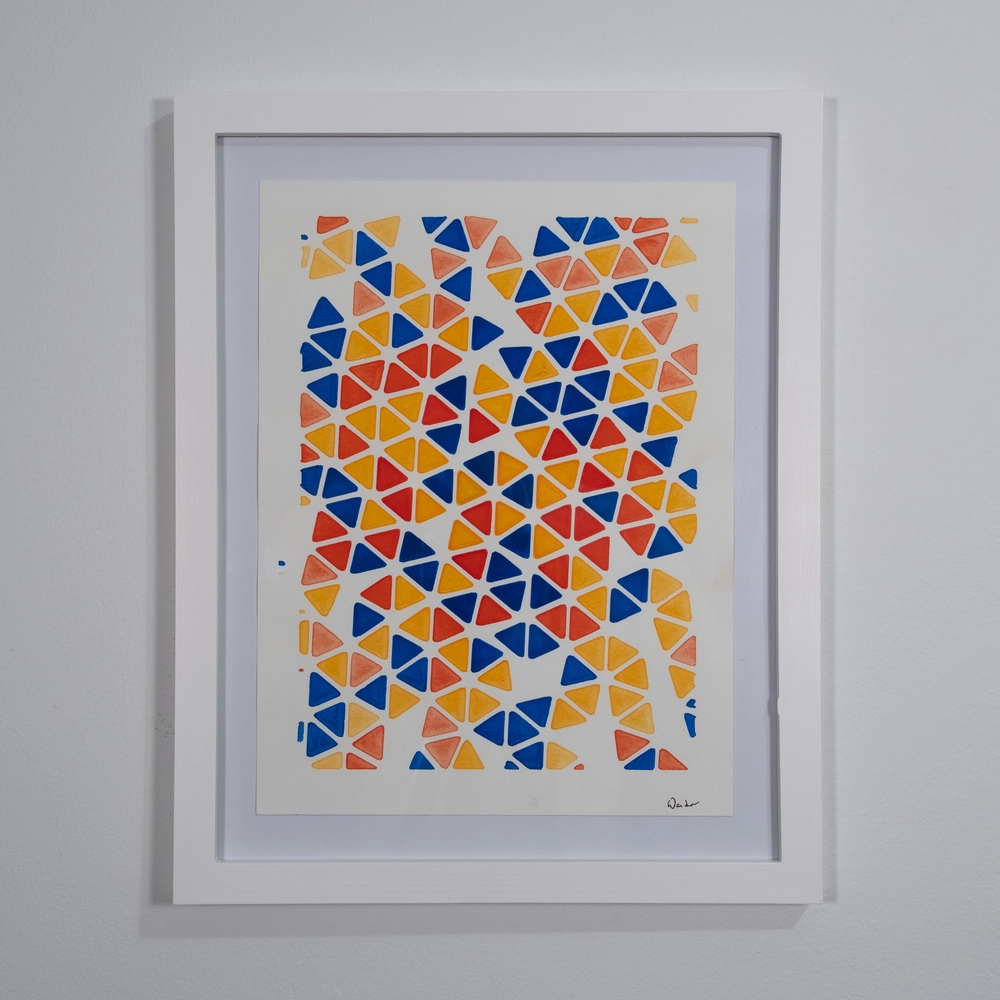
Parameters
shape: [0, 0], [1, 0], [0.5, 1]
count: 350
scale: 0.65
Quads
Foursided shapes (unsurprisingly) produce some very different results. One of my favorite results has come from using slightly “lopsided” squares, meaning one of the four shape is ever so slightly out of position. A packing of regular squares using my packing procedure would just result in a tesselation, after all.
Parameters
shape: [0, 0], [1, 0], [1, 0.9], [0, 1]
count: 20000
Parameters
shape: [0, 0], [1, 0], [1, 0.9], [0, 1]
count: 20000
Trapezoids on the other hand create a much more hectic and vibrant texture.

Parameters
shape: [0, 0], [1, 0], [0.7, 0.7], [0.3, 0.7]
count: 15000
Parameters
shape: [0, 0], [1, 0], [0.7, 0.7], [0.3, 0.7]
count: 15000
Non-convex shapes
So far, all of the shapes we’ve packed have been “convex”, meaning you could wrap a string around them and have the string touch every side. So, of course, we need to see what non-convex, (or concave) polygons look like when packed. This is an area I want to explore in more detail as it seems to produce the largest variety in results depending on the starting shape. For example, here I manage to pack a non-convex quad in a very dense configuration:
Parameters
shape: [0, 0], [1, 0], [1.7, 0.7], [0.7, 0.1]
count: 20000
Modifying the shape even just a little results in a dramatically different packing, with far larger areas unable to pack any shapes edge-to-edge:
Parameters
shape: [0, 0], [1, 0], [1.7, 0.7], [0, 0.2]
count: 6000
Closing thoughts…
This whole idea of packing shapes is still really underexplored, and I’m sure there’s plenty more beautiful and interesting examples to find.
On a different gear: producing these packings efficiently required some fairly optimized code, and resulted writing some C extensions for my Python plotter library. If folks are interested, this could be the topic of another blog post.